Halloween Animatronic

Background
For a few years, my oldest’s career path has been approximately “Disney Imagineer” - combining tech with storytelling and audio-visual artistry. This year felt like a great opportunity to test that a bit, try making a bit of technical magic with her using some of the tools of the trade. So we got a compressor, a pneumatic cylinder, a linear actuator, a power supply, and a box of wire, fittings, valves, and relays and got to work.
We bounced a few ideas around - some kind of Jack-o’-lantern, or a jump scare, or one of the Universal monsters, but the kids quickly determined the most clearly and easily articulatable Halloween decoration to be the Big Plastic Skeleton. We chose a 6-foot model, poseable at the ankles, knees, hips, wrists, elbows, shoulder, neck, and jaw. Every summer we try to align one of the kids' camps with a bigger creative interest of the moment, so while our Imagineer-in-training was at NW Film Camp, her sister was attending PAM CUT Remix Revolution, a DJ camp introducing software, controllers, and some basic music theory.
It quickly became obvious that our Skeleton was a DJ, and its name was DJ Skelly Skeletone (edging out my name, Hector the Skelector).
I wanted to introduce them to a range of motive systems, so I bought a pneumatic cylinder and a linear actuator. The original plan was for the cylinder to drive some back-and-forth scratch action on the hand/wrist, while the actuator would bob the torso to-and-fro, jamming out with the chewns.
Construction
We were soon down to work - the 6mm PU hosing was very easy to work with and came with a nice little tracheal cutter. We learned about the difference between valves and regulators, added a regulator for the cylinder, added some needle valves for each direction so Skelly could move at different speeds back-and-forth, and did a lot of thread taping (we also learned that you don’t tape threads with washers, do tape threads without).
At this point, we could have gotten some USB relay modules going, to make Skelly fully programmable. I wanted to show them how Walt would have had to approach this in the 1950s, though, so instead I bought some assymetric relay timers and a reversible motor controller. By twisting the little trim pots, Skelly could adjust from easy-vibing to caffeine-charged DJ Swamp which, while fun, also clearly messed with the pneumatic duty cycle!
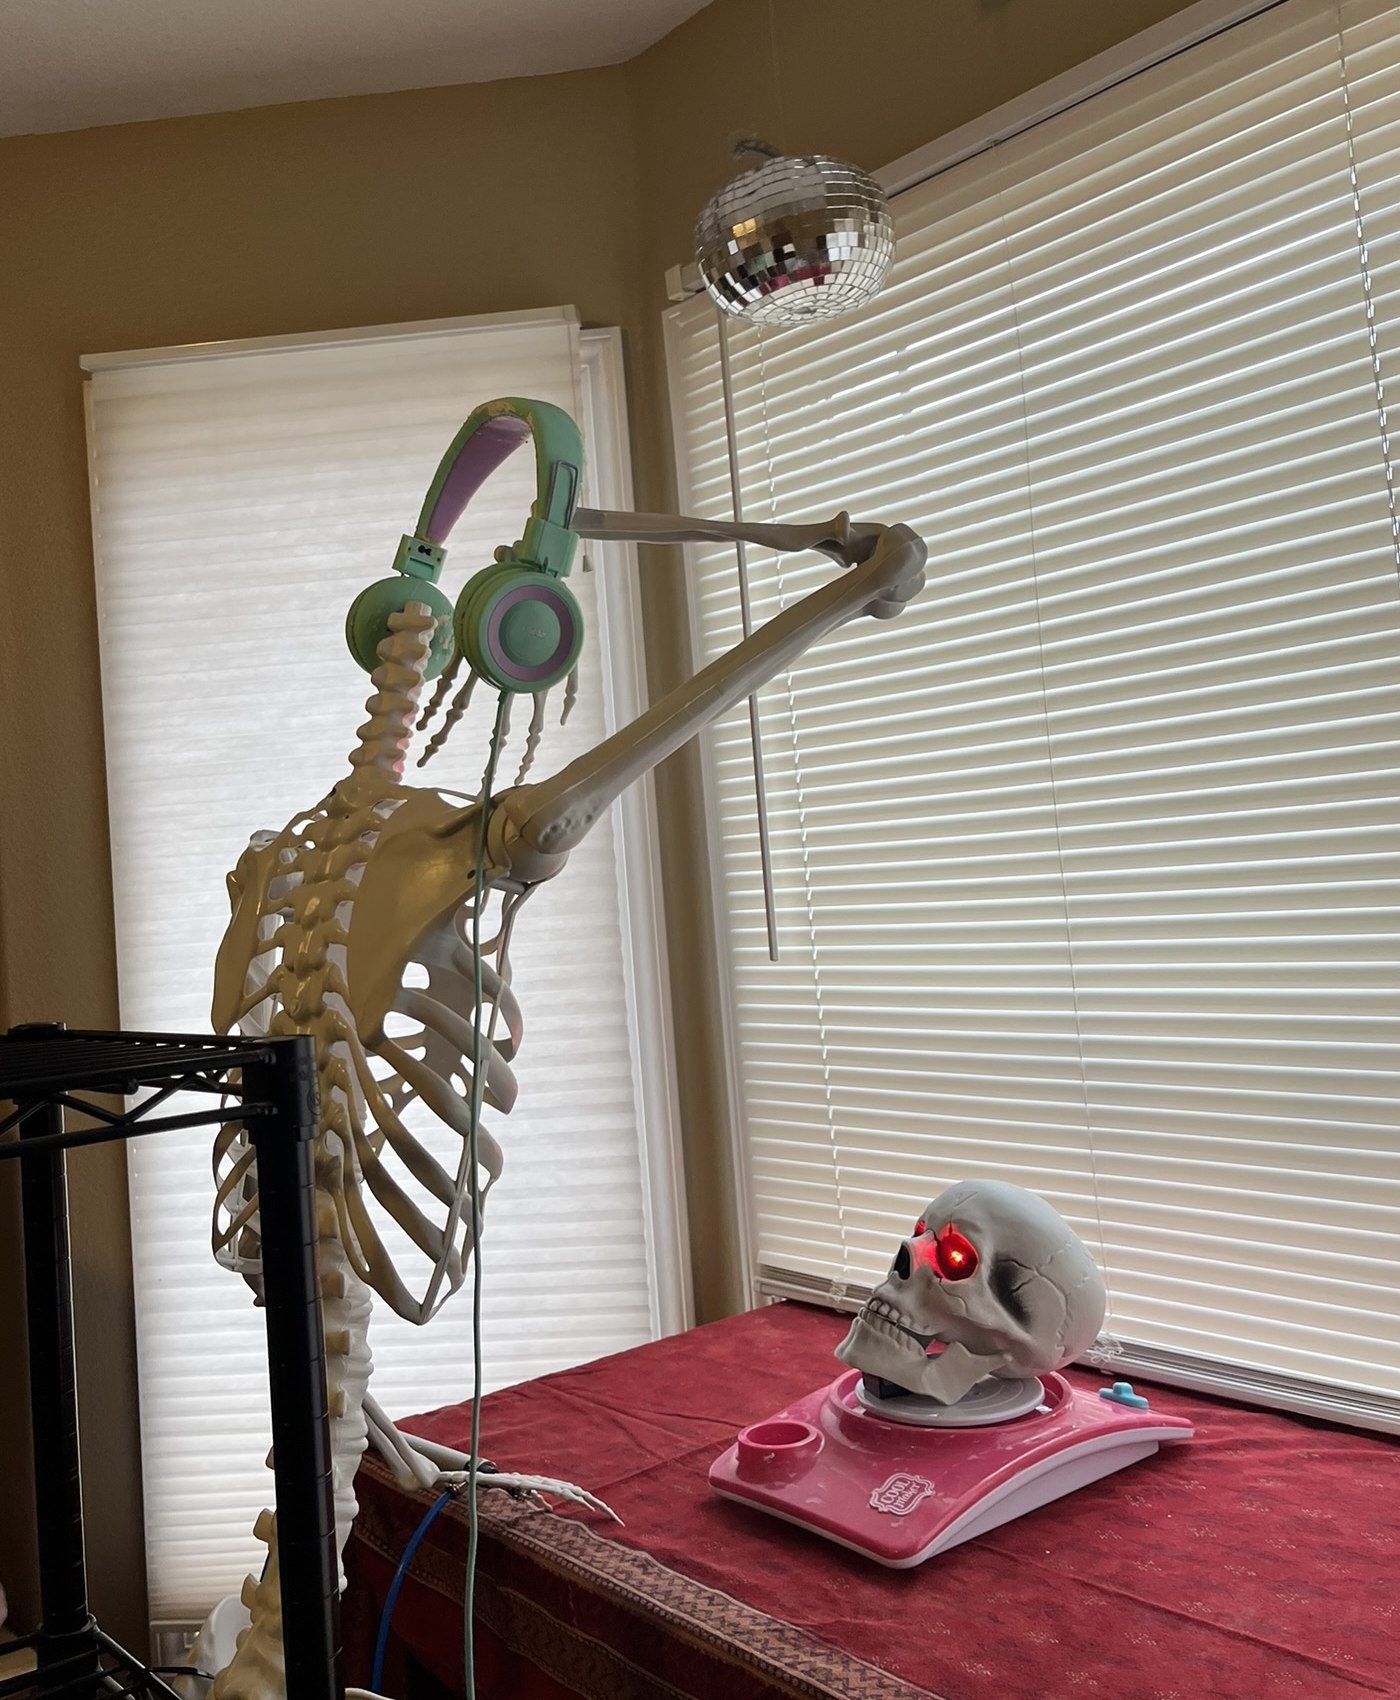
The big day arrived and we got Skelly strapped to its frame, a set of wire shelves with lots of horizontal and vertical bars and wires to zip-tie onto. We hung up a spinning disco ball (actually, disco pumpkin), added some red LED lights to Skelly’s eye sockets, and put the skull on a kids’ air-dry clay pottery wheel, which spun at just the right speed to give a nice effect of Skelly leaving his noggin on the wheel of steel.
Having finally set Skelly upright, with piston attached to hand, we found out that the whole body vibed pretty well already. In a moment of panic over unused resources, we realized we could hang some Halloween LED candleabras from fishing line, and use the linear actuator to tug them up and down (with a counterweight acting against), completing the eerie scene.
Performance
We added some lights we use for school dances and a soundtrack of the deepest dance cuts of Halloween songs from the 50s to today, from Gabby Cats and the Purple People Eater at 5pm to the Aoki Thriller mix and the Oliver remix of Dangerous later in the night, when the older kids were out.
The night turned out to be rainy and the trick-or-treaters few, but those who ventured out were treated to a definitely-not-store-boughten animatronic in a unique-in-our-neighborhood scene. Several kids thanked us for “setting a vibe” for the neighborhood and expressed that ours was “the coolest house”. Validation from Neighborhood Teens is a powerful motivator!
Postscript
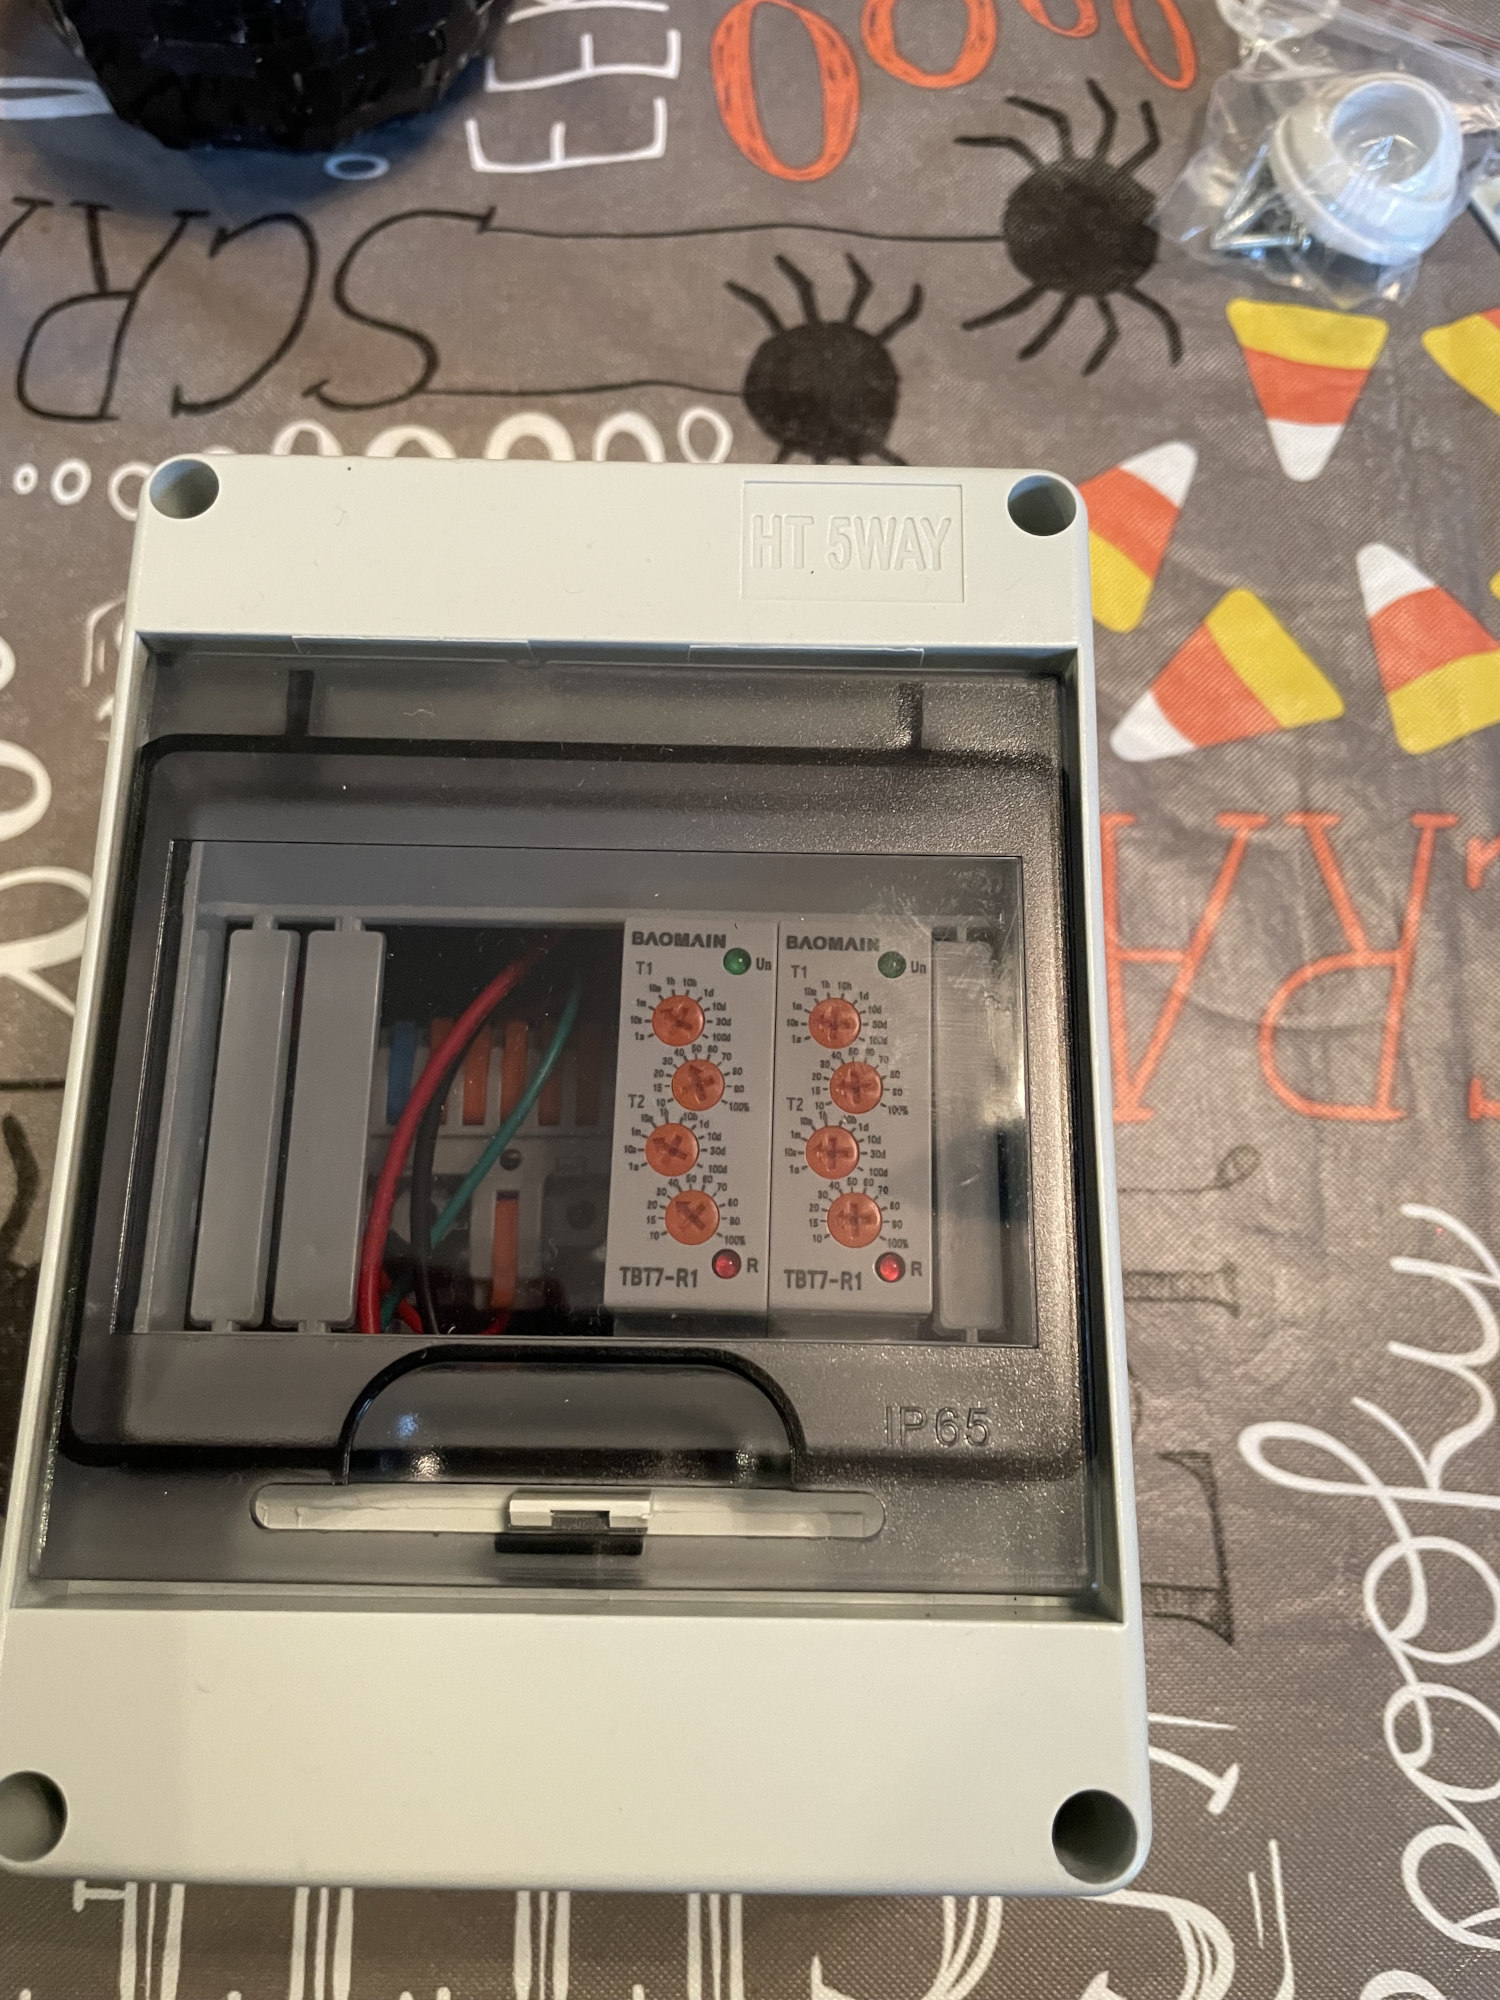
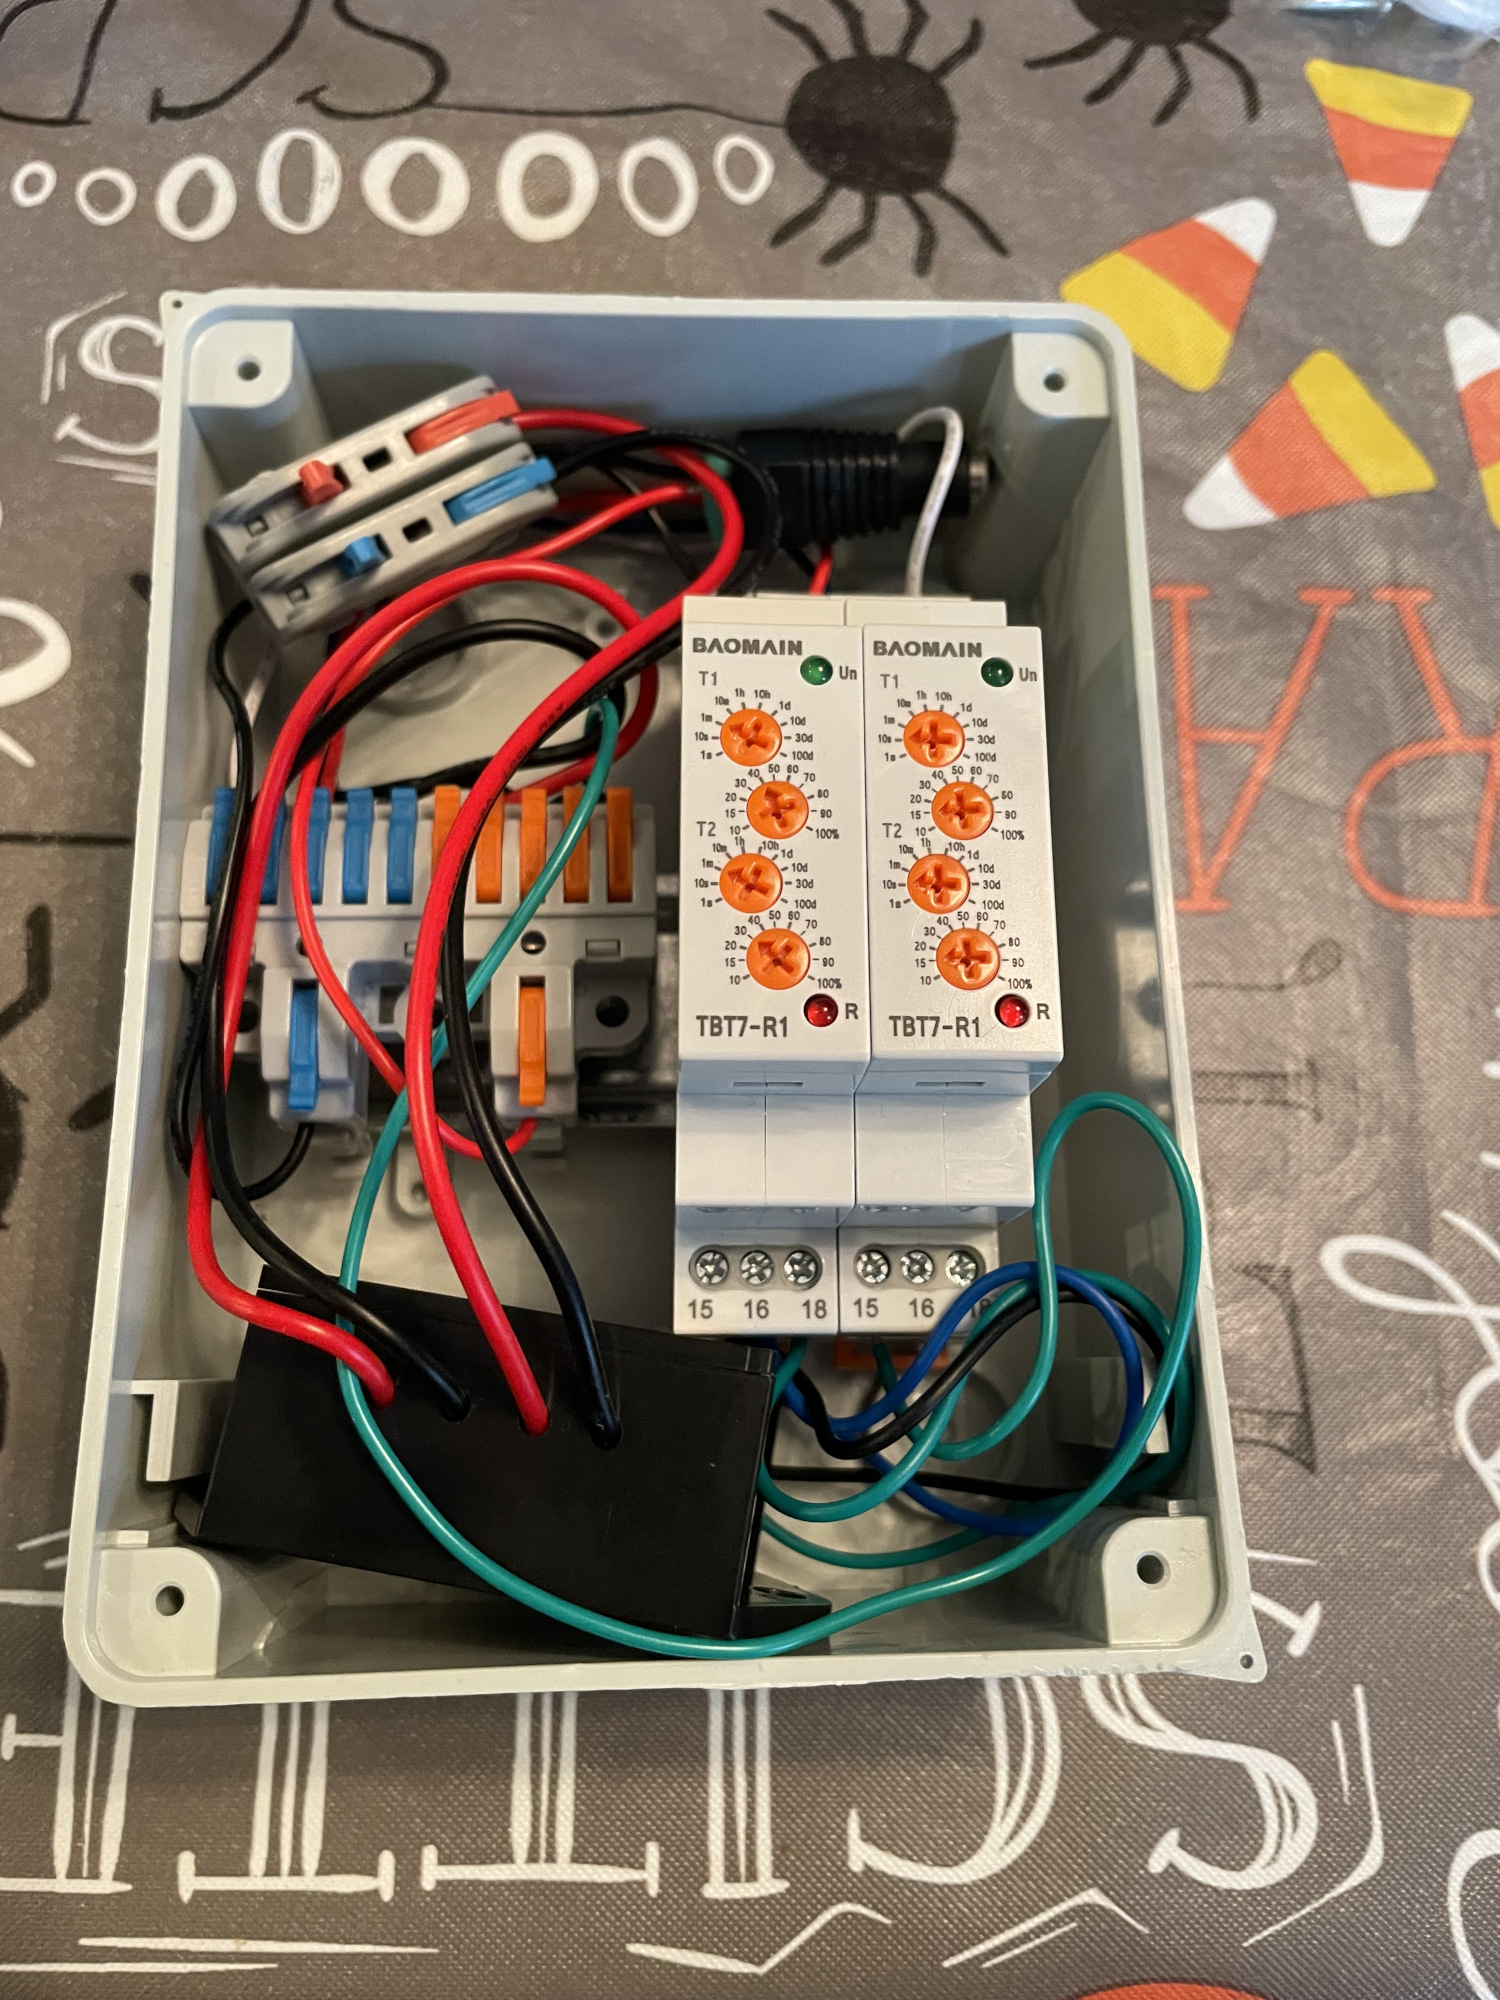
While packing things up, it made sense to see if the electronics could pack into a small industrial enclosure. Happily, the nifty lever-based terminal block came with DIN mounts, so we put all the DIN rail components into this nice little box, with the motor reversing relay sitting on the bottom. Next Halloween, I’ll run some multiconductor jacketed cable in there and put some nice ends on the connectors to make it more plug-and-play.
The kids are already dreaming of building a dark ride that somehow starts in our garage and takes guests on a tour of our haunted back yard. I was happy to show them a very hands-on example of building something cool from junk, spare parts, and individual components, without any screens or computers to abstract away what’s really going on.